Tuesday, October 26, 2010

Headbands & Felt Flowers

Inspired by my friend over at Polka Dots & Ric Rac, I went with my mom and sister to Hobby Lobby to purchase lots of felt and then to Target for elastic headbands. Cutting the felt like a swirled snake and then rolling them into rose-like flowers was pretty easy until I completely hot glued both of my thumbs. I swear I had first degree burns!!


Here are some photos of some recent events:
Kentucky BEATS South Carolina!!!!! the picture was during the 1st quarter......hence Matt is still smiling...
Fun table setting made with things from BB&B, Crate & Barrel, and IKEA :) Thankful for fun wedding presents.

A shadowbox given to us by my auntie & uncles that I used with wedding stuff:
I am a pretty big Harry Potter fan and we found this at the local bookstore......


Thursday, October 21, 2010

Ribbon Wreath


I am hoping that the future owner of this wreath will love it! The wreath is to celebrate having a BOY! Recently I have been on a huge wreath making kick. After plenty of hot glue and burnt fingers, I really liked the way my first one has turned out!


I found the idea thru a really fun blog that I am now following (Tatertots & Jello). The wreath that they made was for Halloween, but it's pretty simple to make it for any sort of occasion or holiday. I didn't truly take pictures throughout the process of making it, so I will simply post some phone shots I did take along the way.

Steps can be found here: Wreath Tutorial


Update:
I was able to visit the soon-to-be momma in November and give her the wreath :)


Baby Tyler was born March 11, 2011
Congratulations to Eve & Jefferson!!!!!!
Isn't this just the cutest picture?!!!


Linking this to:

Visit thecsiproject.com

Thursday, October 14, 2010

i HEART Mod Podge

** This item is being sold on my Etsy**
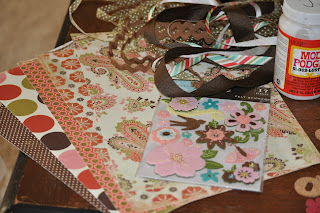
All you need is Mod Podge, a canvas, paintbrush, and scrapbook paper. I always like my paper to coordinate in colors, but not necessarily designs  :)
1. Cut the paper into blocks or strips, however you want to. Lay out the design on top of the canvas to make sure that you have enough paper. You want to be able to cover the edges completely.
2. Completely cover the canvas in Mod Podge. 
3. Lay each paper piece by piece and paint the Mod Podge on top to completely cover the paper top and bottom to make sure it stays in place. This also gets the corners to stay and once dry, a nice gloss.  

4. When doing the corners, fold the paper like a Christmas present and layer the Mod Podge underneath the folds. Press down firmly after putting more on top of the paper. 
5. Once every single piece of paper is glued onto the canvas, paint one more coat on top. 
6. It should take a few hours to dry completely. When it has dried, feel free to embellish away!
The finished product! Love the fall-like colors!

Monday, October 11, 2010

Belated Birthday!!!

Matt turned 24 a few weeks ago on September 18th. (cool fact: Matt was born @ 9:18 on 9/18) For his birthday, he wanted to go to IKEA and the Oktoberfest in Cincinnati, OH. We purchased some much needed things for the house (lamps- we have no overhead lighting) and random gadgets that I desired to use. lol. Then, we went downtown to eat a dinner of bratwurst, beer, and pretzels. For dessert, a monster cream puff.
What a wonderful way to celebrate a birthday!


Happy Birthday!!! 
Love you Matthew!

Saturday, October 9, 2010

Candy Corn Wreath


I saw this on the cover of Woman's Day magazine and thought it was cute. So, I came up with my own version of making the wreath. Until linking the actual craft, I didn't have a clue as to how it was made.
This is my own little version:

My materials:
-cardboard stock (leftover from the wedding save-the-dates)
-hot glue gun
-scissors
- scrap burlap material
-stapler
-bag of candy corn
-ribbon

1. I used random objects (see photos) to trace circles onto the cardboard paper. Then I cut out the wreath with my awesome IKEA sewing scissors (I recommend getting a pair- they're beastly!)
2. Using the burlap, I cut a hole in the center and stapled it to cover the inside of the wreath. Continue to staple around the top of the wreath so the burlap has completely covered the cardboard.

3. Taking the hot glue gun, start from edge of the circle and glue the candy corns (use one large dot at the top of the candy) in a line going in the same direction. Each line should be the opposite direction of the one before. 


4. Make sure the wreath is full of candy corn rows so hardly any burlap is showing. Take a ribbon and tie it in a knot at the desired length for hanging. I add two extra ribbons to make it a little more fun.


Simple, easy craft!
Thanks for stopping by!


Friday, October 8, 2010

Our Second Visitors

Ryan & Elisa came to visit us the second weekend of September. We didn't have much planned and felt a little boring to them. They assured us that a relaxed weekend is just what they needed. When they got in Friday night we went out for pizza at a local restaurant Zwanzigz.
Saturday we watched the South Carolina Gamecocks beat the Georgia Bulldogs (Whoo!!) and then drove out to Nashville, IN. We walked around the downtown, which really reminded me of Pigeon Forge, TN. There are a lot of handmade items, wooden shops, and hippie/biker things. Pretty interesting place.
Sunday we checked out a new church and enjoyed grilling out afterwards. Elisa and I worked on a small craft while the boys watched more football. We also had a soap confusion in the dishwasher. Fun times! They left Monday morning, and we really enjoyed having them come see our side of the world. We look forward to spending more time with them whenever we're home!


Related Posts Plugin for WordPress, Blogger...